|
Replacing the Battery in a Norelco Reflex Plus Razor
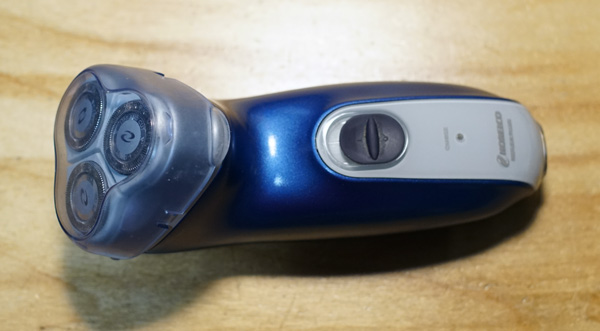
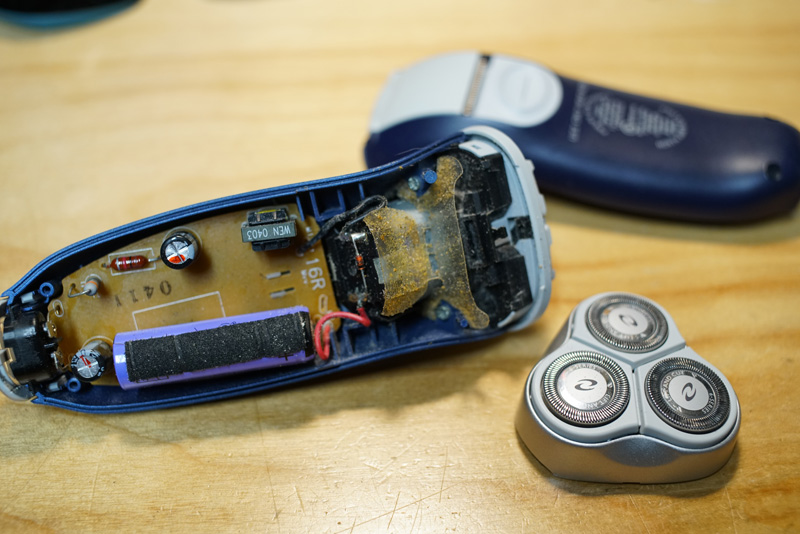
The Norelco Reflex Plus electric razor
is an old triple rotary head model. I've had mine for many years. The internal rechargeable battery started to fail (unable to hold a decent charge) a few years after I first got it; I expected this. Which leads me to the main reason why I bought this razor in the first place - this razor can run when plugged into the wall socket. Many rechargeable razors will only run off the internal battery; plugging them in is only for charging. This does little good when the battery dies; and the battery always dies over time. After many years of running off the wall current, I took a hour to finally replace the internal battery and make it portable again. This is a simple job and well worth doing to extend the life of a great razor.
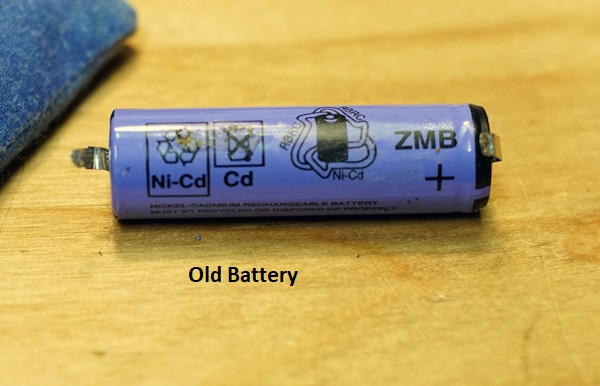
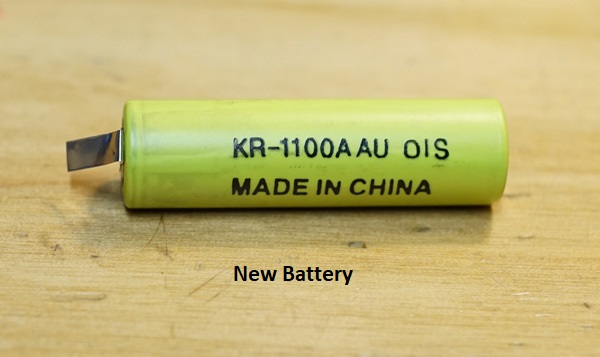
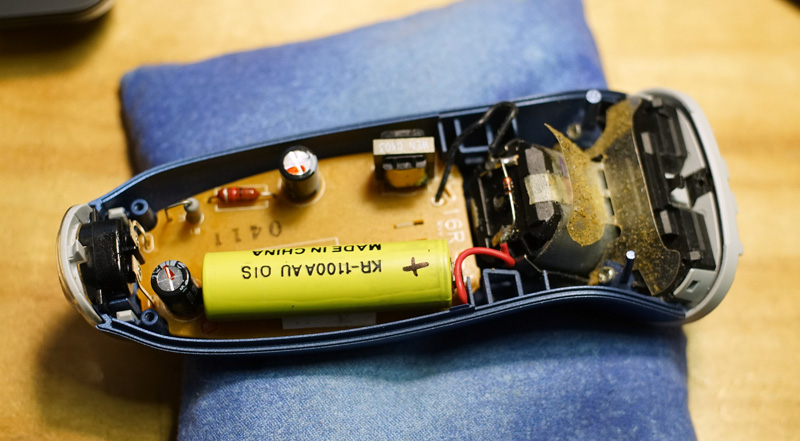
The internal battery is a single NiCd 1.2V AA sized cell. It's capacity is not written on the jacket. The battery has solder tabs soldered to the main circuit board so the replacement procedure is to simply unsolder the old battery and solder a new one in its place. I replaced it with a 1100 mAh NiCd cell I already had (left over from the SonicCare toothbrush replacement I did years ago). It's important to replace the battery with a like-kind (NiCd with NiCd) as the charging circuit was made for this battery type. NiCd batteries come in different forms. For user replaceable uses, you can buy some that look just like standard AA cells - these are meant to be inserted into a holder that usually has springs on one or both ends. For sealed internal use such as this razor, you can buy NiCd cells with and without solder tabs. For this application get ones with tabs. Here are pictures of the old battery (after removal) and new battery (before replacement).
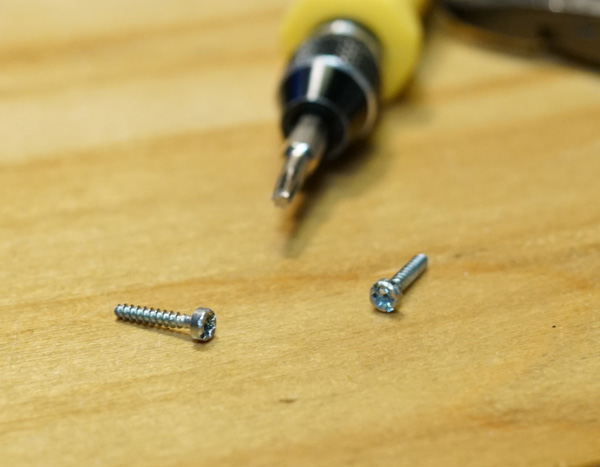
The only tricky part of this job is removing the 2 screws that hold the outer casing together. Like many manufacturers, Norelco uses security screws to keep the casual user from accessing the innards. I used a T9 bit to remove the 2 screws. From there, the back popped off easily.
Pull up the circuit board from the housing but do not remove it entirely. Flip it over to expose the solder side. Be careful not to damage the charing port or any of the existing wires to the motor. Locate the two areas where the battery tabs go through the circuit board.
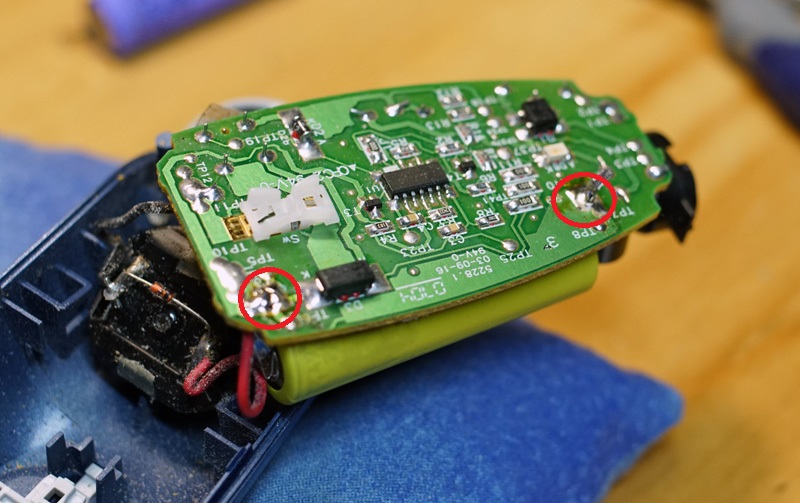
Remove the solder from these two areas and pull the tab from the battery side to free the old battery. My new battery had tabs that were a little wide for the existing holes so I trimmed them down before inserting them and soldering them in place. Be sure to note the polarity of the battery - (+) is towards the shaving head and (-) is towards the charging port.
At this point, you can use the plastic switch on the circuit board to turn the razor on. Chances are there is some charge in the battery so the motor will run, even if it's just for a few seconds. That'll be enough to verify that things are ok. I also replaced the double sided sticky foam to holds the battery in place. Note that there's plenty of space on the circuit board for the battery but you still need to mount it in roughly the same space because the plastic housing has moulding ribs that confine the battery to that part of the board.
Reassembly is a simple matter of screwing the back half of the case using the two original screws. Make sure that the main sliding power switch is in the "off" position to match the plastic power switch on the main circuit board.
|