|
 Matrix Clock
(A dot matrix clock and messaging center remotely programmable over Bluetooth Low Energy. January-2021)
Numitron Space Invader Alarm Clock
(A desktop alarm clock with Numitron tubes and 76477 sound chip. July-2020)
Another Analog Digital Clock
(A desktop analog meter clock with temperature and humidity using VU meters. April-2020)
An Analog Digital Clock
(A steampunk inspired digital clock with analog meter display. September-2017)
A Larger Battery For An Old UPS
(More power. November 2020)
Replacing the Battery in a Norelco Reflex Plus Razor
(New life for a great razor. May 2020)
Replacing the Battery in a Sonicare Toothbrush
(Don't throw out a perfectly good toothbrush. October 2010)
Replacing the Battery in a TI-59 calculator
(Reviving this classic calculator. December 2015)
|
|
Replacing the Battery in a Sonicare Toothbrush
If you've owned a Sonicare toothbrush, you're probably aware that the batteries are sealed inside the body of the device and are not meant to be replaced by the user. I believe the newer models allow the unit to be disassembled so that the toxic NiCd batteries can be properly recycled but there is still no way to replace them with fresh cells. As a sales gimmick, this works - why allow the consumer to replace a $5 item when they have to spend 10 to 20 times that for a new one?
I think this is just outrageous; and I am not alone. Do a Google search and you will get lots of hits for replacing Sonicare toothbrush batteries. As you'll see below, it's not that difficult a task though it does require some basic DIY abilities. Of course the process could be made easier of Sonicare designed the unit in a serviceable way - clearly it wasn't.
So without further ado, here's what I did. I don't know the exact model of my sample but from what I've seen, the interiors of the various models are fairly similar. Proceed at your own risk! Standard disclaimers apply.
|
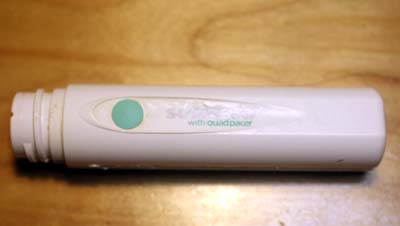 |
Here's what I started with.
A good tool to have is a digital camera. Take pictures as you proceed. This will help you when you have to re-assemble the parts you've removed.
Basic tools I used - soldering iron and vaccum de-soldering tool. Dremel with various bits. Utility knife. Multimeter. Wire stripper & cutter. Caulk. Clamps. |
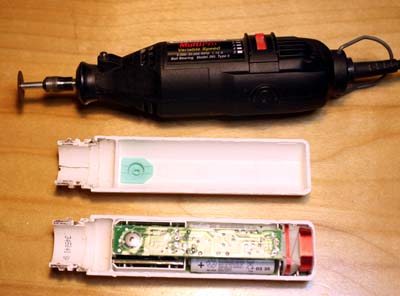 |
Remember: the Dremel is your friend!. I used a cutoff wheel (it's like a thick piece of round sandpaper) and split the plastic at the seam. Be careful not to cut too deep as you risk cutting the coils. Go slowly, removing a little plastic at a time. You'll "feel" when you cut through the plastic entirely.
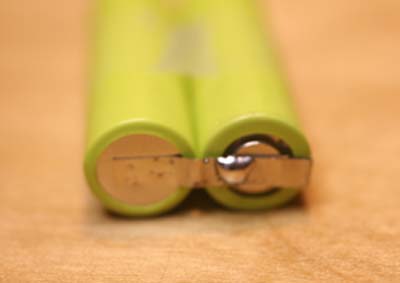
Once open, you'll see four major components - the pickup coil at the base that charges the battery, the oscillating coils at the top (under the circuit board in this model) that vibrates the brush, the circuit board, and the batteries. Mine has 2 AA cells; others may be different. |
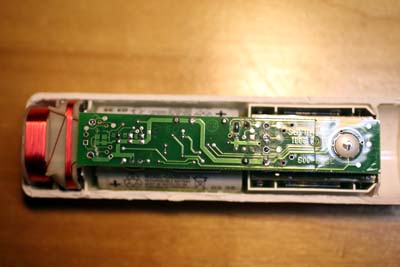 |
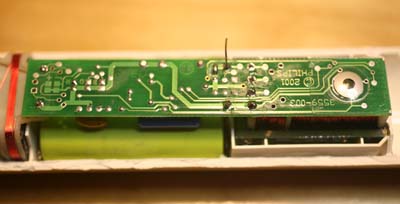
Here's a closer view. On this model, there are 8 pins and wires to deal with. All 8 attach from the bottom so you have to de-solder them from the top in order to pull the board off. The two white batteries are below the board, encased in green epoxy.
Two pins are on the left of the board as shown. They connect the charging coil to the board. Four pins are just right of the middle and connect three coils (under the board on the right side) to the board. These 6 must be carefully de-soldered. The remaining two are wires from the batteries. Snip the wires from the sides (one on each side). Remove these later after the board is free. |
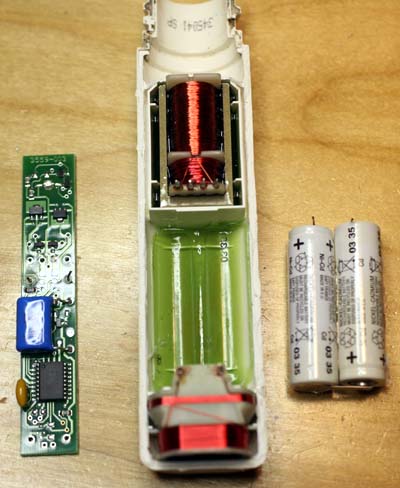 |
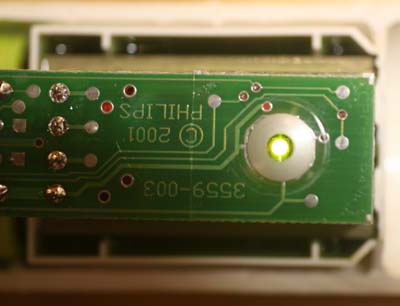
This picture shows your goal. Now I skipped the hardest part - removing the solder.
Unfortunately, I don't know of any tips to give on how to do this. Perhaps the best tip is to use a vaccum device. Solder wick did not work for me. The 6 major pins (4 for the top coils, 2 for the bottom coils) sit in the molded plastic case. The heat from the iron will soften the plastic and if you pull too hard on the board, it will pull the pins out. Since the magnet wire is attached to the pins, they'll break. I had two such breaks and had to carefully solder them back together - not fun. If this happens to you, be sure to check for connectivity at the pins after you repair the wires. In this picture, there are 3 coils attached to the 4 pins layed out horizontally. The rightmost is common to all 3 coils. The remaining three pins go to each coil. Use a meter to check for continuity.
Also obvious in this picture is the green epoxy used to hold the batteries in the case. I used a utility knife to score the seam between the battery and case as much as possible. Then I used a flat head screwdriver to pry the batteries off. Be careful not to exert so much pressure that you crack the case.
Note the orientation of the board. Mine has the components facing down. That's how it needs to go back in later.
If you have lot of extra epoxy left over as in this picture, use the dremel with the right kind of bit and remove as much as you can.
|
 |
I bought some high capacity 1100 mAh Sanyo NiCd cells from BatteriesAmerica. You can also use standard capacity NiCd (600 to 700 mAh). I happen to like Sanyo batteries but you should use whatever fits your budget and is easily available. Be sure to get the same type of battery as was originally used. Mine had NiCd so that's what I got; don't mix with NiMH or other technologies. I ordered mine online with solder tabs to make it easier to add wires. These were over $3 each plus shipping.
In this picture, I folded the solder tabs together on one side to connect them in series (positive to negative). A drop of solder holds it all together. |
 |
Don't order the batteries until you have completed the disassembly and feel confident that there is no damage. If there is damage beyond repair, consider giving up at this point - no harm, no foul. If this happens remember to still properly dispose of the old NiCd batteries - contact your local board of health.
On the other side of the battery pack, I used the solder tabs to hold two pieces of wire. Again a little solder is all that's needed. These wires will go through the board. They'll replace the two wires that were cut earlier.
Note the polarity. Make sure you duplicate the same layout as the original pack. In this example, the (+) wire is on the right and the (-) is on the left to mimic the original set. A piece of tape holds the two batteries together. |
 |
Now it's time to put things back. First make sure that all 8 holes that had pins and wires are nice and clean.
Put the batteries back in the same orientation as the original. Apply a bed of caulk to hold the batteries. It's not epoxy but it does the job.
Thread the 2 wires from the batteries through the holes in the board. Line up the remaining 6 pins and push the board into place. Remember to match the original orientation of the board. In my example, the components face down. In this picture you can see one of the battery wires sticking up prior to soldering.
Solder all 8 pins and wires. |
 |
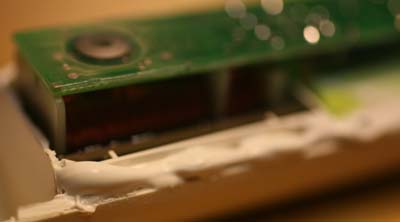
It lives! The green light is good to see but the batteries are barely charged when new. |
 |
Now let it sit in the charger. I kept an eye on it for the first hour or so to make sure things were good - no smoke, excess heat, etc. Then it's time for an overnight charge.
The next morning, I clamped the other half in place, added a brush and turned it on to make sure it worked.
Also check that the caulk around the batteries has solidified. Loose batteries will make the whole unit run loud. Luckily, the batteries have no place to go so if they do come loose from the caulk, it's no big deal.
|
 |
For re-assembly, use more caulk. Like the Dremel, caulk is your friend too :)
Use extra, it won't hurt. I used exterior grade caulk since this will get wet. Make sure you cover all seams. |
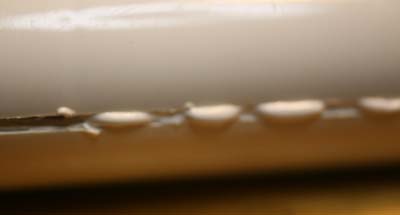 |
You want the caulk to squeeze out the sides. Wet your finger and run it across the seam to remove excess caulk. I used two spring clamps to hold the unit together overnight. |
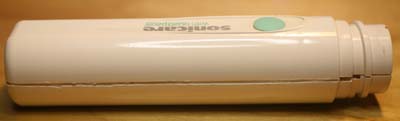 |
And here's what I ended with. Good as new. I don't know if it'll survice another replacement in a few more years but doubling its life for a few dollars is pretty good.
Remember to recycle the old NiCd battery - the cadnium is toxic and need to be disposed of properly. |
|
|
5-October-2010
Note: The
contents in these pages are provided without any guarantee,
written or implied. Readers are free to use them at their
own risk, for personal use only. No commercial use is allowed
without prior written consent from the author.
|
|
 |